Thursday (22 Apr) as I drove into work, I knew the first few hours would be unbearable. My photos were waiting to be picked up from L’Imagerie, but they weren’t open until 1000. So I had to wait until my lunch break to go pick them up. The whole day I didn’t know what to expect. I’d never had medium format film developed and, while I’d had contact sheets with my APS film, it was not a true contact sheet.

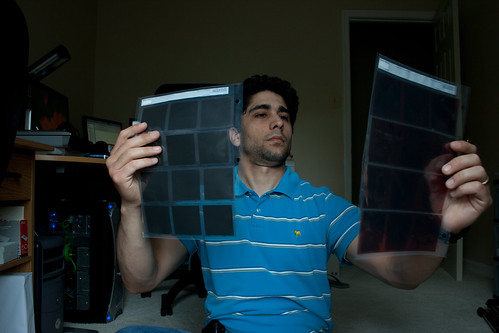
When I was handed the manila envelopes holding the negatives and contact sheets, I was filled to the top with anticipation of seeing the results. And, when I did, it was great! And, to my joy and surprise, nearly all the photos came out! I knew, given the Holga’s mere offering of two exposure settings (sunny and cloudy) would make it a crapshoot to know whether or not I had done the right thing. But over half of the colour photos came out and more than two thirds of the black and white ones came out.

So I skipped the gym to go home and scan them so I could share them with the world! Once I figured out how to setup the negative scanner on my Canon Canoscan 8800F, I set it to the highest quality, 9600 DPI, and told it to SCAN! And … it … failed. I didn’t have enough RAM for the resulting 1.2 GB files! I was deflated! The whole point of shooting medium format is to get all that fidelity! Just like the digital medium format cameras I was ending up with huge file sizes, but it wouldn’t scan!
So I decided to go one step lower and get 500 MB files. This took 15 minutes per image. So I was only able to scan the colour roll as that took nearly four hours on its own. But I am very happy with the results of the scans! Also, the scanner was able to have a little more exposure latitude than the contact print, so, after scanning, something like 90% of the colour roll came out OK. It would need some tweaking in Lightroom or Photoshop, but it would probably be workable. That got me really excited for the possibilities to extract some details from some of the overly dark shots in the black and white rolls, although things have just been way too dark there.

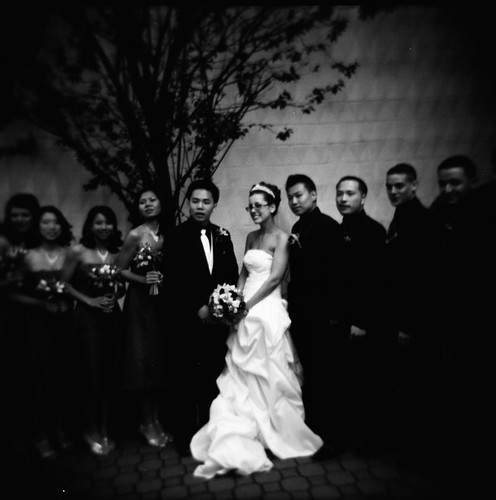
Looking at the scanned negatives, I was able to get a much better view of the photos and the depth of field. As you know, depth of field and focus decrease as a photo is enlarged. That’s why photos with subtle levels of blur can look fine on the digital camera’s on-camera preview, but look horrible on the computer. What I like about the Holga is the way the photos quickly degrade when you leave the depth of field and also out towards the edges. It really brings to focus whatever’s in the center. I also enjoyed the square format and the vignetting. I’m not about to adapt vignetting in all my photos because that can definitely get old quickly, but I definitely love how it complements the other imperfections the Holga introduces to produce a workable whole. I got a newer model which is less likely to have light leaks. Of all the imperfections Holgas have, I was least enthusiastic about dealing with light leaks, so that doesn’t bother me. It might bother you.

So I learned with the Holga that you should use ISO 400 film because of the small apertures involved. Normally, photographers would recommend ISO 200 film for general use and ISO 100 for those times when quality was paramount. With my experience, I’d say that sunny is more or less only for a bright, sunny mid-day photo and any photos in the shade, late morning, or early evening should be taken with the cloudy setting. Any darker than that and you’re going to need flash or some other kind of artificial lighting.
Overall, I’m pretty psyched about seeing the results when I shoot from my Yashica or my Franks Solida III. The only negative was the sticker shock. It’s a little over $1.25 per photo from purchase to development. If I did a film 365 project and took no other film photos, that would be $485 – that’s a mid-level Canon SLR lens. That’s a LOT of money. So I’ll have to be sparse with my film photography, but that’s OK by me. The results with the Holga have also interested me in other low tech photographic techniques such as pinhole photography. I may try some unique ideas with that once I figure out how long I need to expose for. I also think the Holga would have a great aesthetic for street photography and plan to take it with me next time I go to Manhattan.

3 responses to “Results of a Plastic Point of View”
Are the light leaks why the corners are blacked out?
No, that’s called vignetting and it has to do with the shape/size of the lens and how it lets light in. This is what light leaks look like:
http://www.flickr.com/photos/midgetdrunk/4521266953/
(The yellow parts)
[…] Last time I wrote about my dabbling in the film world I had had 3 Holga rolls developed. My Yashica and Franka Solida III had arrived after my trip to NYC so I had yet to run any film through them. I shot a few frames with each camera when Danny and Dina came to visit in April and then let the cameras lay dormant. As I explained in a previous post, with the cost of film and development so high, these cameras were somewhat for special occasions. I took the cameras with me to Delaware (a trip I have yet to blog about), and shot with the Holga and Yashica. […]