Number 9 Number 9 Number 9
EricMesa
- 7 minutes read - 1489 words[caption id="" align=“aligncenter” width=“500” caption=“Everything but the RAM”] 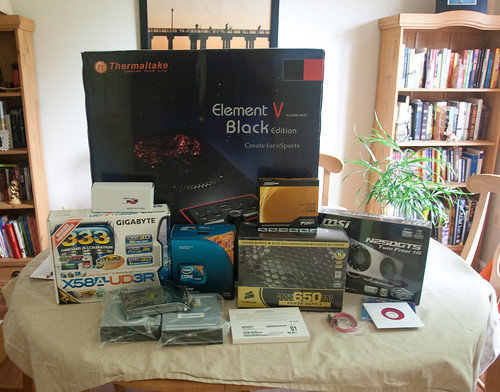 [/caption]
14 Sept Sometime in my junior or senior year of college I came across a book about building my own computer and resolved to do it. My tribulations with my Dell computer were enough to convince me that building computers with generic parts was the way to go. Later experience with my Emachine and the inability to tack on a DVD-writer (because they had blocked the slot with a metal mesh) confirmed this was the case. Just under five years ago I was finally able to do this and built my [first computer](/2006/01/03/new-computer-built/ /2006/01/07/building-the-computer/). I can’t believe it took me four hours to put that first one together. Nowadays, if things go well, it takes about an hour. In the time since then I’ve built 8 other computers. Of course, those weren’t all for me. I also built Dan and Dave’s newest computers, my father-in-law’s computer, his sister’s computer, and a bunch of others.
I’ve learned a great deal about building computers over this octa-history. First off, I learned that if you want a low end computer you’re better off getting an off-the-shelf computer. They’ve got the economies of scale to make it worth the money at that end of the market. Second, I learned that there are more reasons to choose between AMD and Intel than just price. For one thing, AMD tends to change the form factor a lot less than Intel so you don’t have to replace your motherboard as often. For another with AMD chips it tends to be a LOT easier to install the stock heat sink/cpu fan than with Intel. I HATE trying to get the Intel snapped into place and it infuriates me that they can’t make it as simple as with AMD. When I first started building computers I always bought Seagate hard drives. Then, some time around early 2008 they started having huge quality control issues and a bunch of Seagate drives I had began failing within a year of installation. Ever since then I’ve been using Western Digital drives without any problems. I’ve also learned that case designers don’t always follow standards as well as they should. With my first computer I was unable to screw in all the motherboard standoffs because they didn’t line up perfectly with the case. And, with Dan’s computer, the case designer’s idea for a wonderful toolless case conflicted with the bestial size of his graphics cards. And, I’ve added Gigabyte to my stable of trusted motherboards. Whenever monetarily possible, I try to stick to one of these boards.
So, with all this knowledge in my head, I embarked on computer number nine. This was to be a replacement for my first computer ever, my adam. (Actually the network name is Echan2) I don’t have the funds to constantly replace my computer and my current computer works perfectly fine. (Technically, the power supply fan is going bad, but that’s a pretty cheap replacement) So my metric for replacement is not when cool new tech comes out, but when my computer no longer does what *I* need it to do. What I need my computer to do is play Civilization V. Civ and Sim City are the only games I unquestionably buy on release day rather than waiting a few years to get the game and its expansions for $20. Civ 5 comes out very soon. So it was time to build the new computer.
[caption id="" align=“aligncenter” width=“500” caption=“Great Cable Design”] 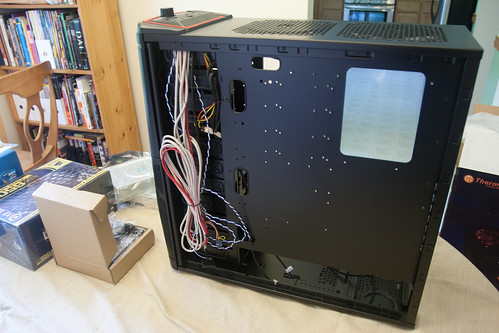 [/caption]
This time around I wanted to get an upper-mid level computer in the hopes that it would be more modularly upgradable rather than needing a full replacement in five years. This involved getting a motherboard that supports USB 3.0 and SATA III. I don’t think I’ll be needing USB 3.0 for a while, but it’s likely that the next DSLR I buy will use it. SATA III, however, is in use now. Both hard drives I bought for this system will use it. I’m not sure if the magnetic hard drive would even saturate SATA II, but I do know that my solid state drive will. So I’m expecting blazing fast boot times and fast load times as well. I also went with a Blu Ray burner as they’re finally cheap enough to make sense. I intend to use BD-R discs to backup my photos while using less space than with DVDs and DVD-DLs. I also picked up a SATA-based DVD drive because I’ve heard that DVD-R performance on Blu Ray burners tends to be worse than a standalone DVD burner. I’m happy there will not be any stupid PATA cables in my case. They’re FAT and unwieldy and obstruct too much air flow in cases. And the make it harder to have a neatly rigged case. I really like how nice and neat I got the cables in Danielle’s computer and I’m hoping to replicate that success with this one. So, time to finally build this sucker.
15 Sept The case’s tool-less design took a bit to get used to. Every case designer does it in a different manner. This one is probably the least intuitive I’ve used, but it wasn’t too bad once I got the hang of it. On the first day my RAM didn’t arrive, so I installed the CPU/CPU fan/heatsink, hard drives, optical drives, and power supply. I didn’t yet hook up any of the cables as Dan came over to visit, but I do love how well organized they are in the case. Just like the computer I just built for Danielle, this case has holes in the motherboard tray to allow for better cabling and better airflow. In fact, it really makes me wish I had a modular power supply. I may need to move the hard drives around a bit to make sure I have someone to stuff the extra cabling. The case instructions were an odd mix. They had the best grammar of any case I’ve build so far (no engrish), but certain key instructions were missing. (Like exactly how to hook up the fans so as to have them properly controlled by the fan speed dial) I had to remove a bar at the bottom of the case to fit in my power supply. I guess that bar’s to properly support smaller power supplies, but they’ve been more or less the same size in my experience. Finally, I think the drive cage has the worst design of any drive cage I’ve used. First of all, the instructions failed to mention some retaining screws that kept me puzzled as to how to remove the cage until I noticed them. (The case is a very nice solid black inside which looks great, but the screws are black too….) Second, unless there’s something else the instructions left out, it’s very hard to screw the hard drives into place without a magnetic screwdriver. The holes are EXTREMELY recessed. The solid state drive is screwed into the bottom of the case (as was the case with my wife’s case) and that was a cakewalk.
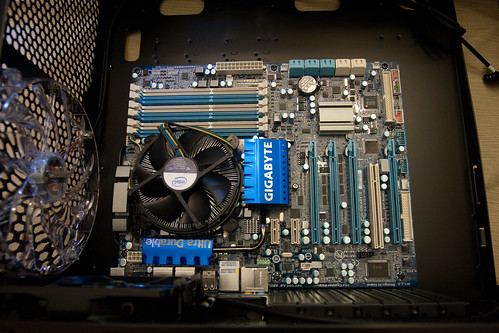
[caption id="" align=“aligncenter” width=“500” caption=“The inside of the Chassis”]  [/caption]
The motherboard I got was very interesting. First of all, I didn’t realize that the USB and eSATA plugs were so similar. And they must be, because it appears that two of the slots in the back of the motherboard are marked USB/eSATA. I haven’t read through the instructions yet, but I guess it must be something set in the BIOS. Second, it was odd that the CMOS reset button was on the back there too. Sure, it’s great to not have to open up the computer to reset the BIOS if it goes wrong, but it’s too easy to accidentally press. Third, for a motherboard with all the latest tech (USB 3.0, SATA III), it’s odd that it has both a keyboard and mouse PS/2 port in the back. The most recent motherboards I’ve built (both from ASUS and Gigabyte) have only had one. I do like the motherboard’s layout including the way that the SATA ports are orthogonal to the top of the board. That should allow for less interference with long graphics cards.
[caption id="" align=“aligncenter” width=“333” caption=“The yellow section can connect either eSATA or USB 2.0”]  [/caption]
I didn’t place my graphics card yet, as those tend to get in the way of cabling. Right now I’m thinking of getting everything cabled up to the case, adding the PSU cabling, and then slotting in the graphics card before twist-tying the cables for better airflow. To see what happened next, check out my review of Windows 7, appearing tomorrow.
Here’s the rest of the build process.
[caption id="" align=“aligncenter” width=“500” caption=“PSU Installed, but not Connected”] 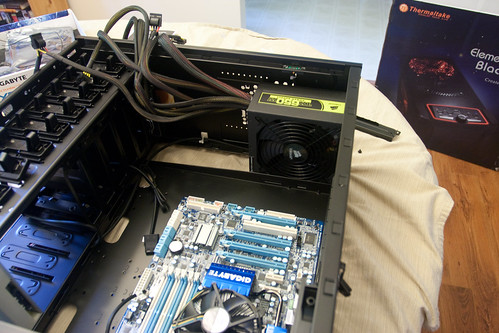 [/caption]
[caption id="" align=“aligncenter” width=“500” caption=“Optical Drives Installed”] 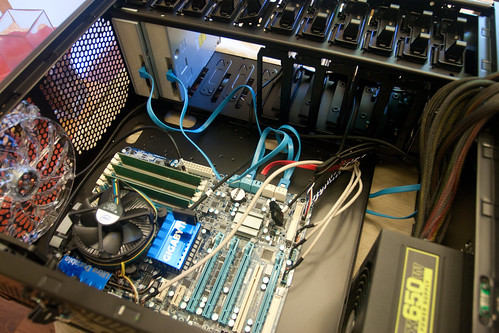 [/caption]
[caption id="" align=“aligncenter” width=“500” caption=“Hard Drive and SSD Installed”]  [/caption]
[caption id="" align=“aligncenter” width=“500” caption=“First Boot”]  [/caption]