Tutorial: Geo-Tagging Your Photos
By EricMesa
- 4 minutes read - 702 words[caption id="" align=“aligncenter” width=“500” caption=“Some of the equipment you need to geo-tag your photos.”] 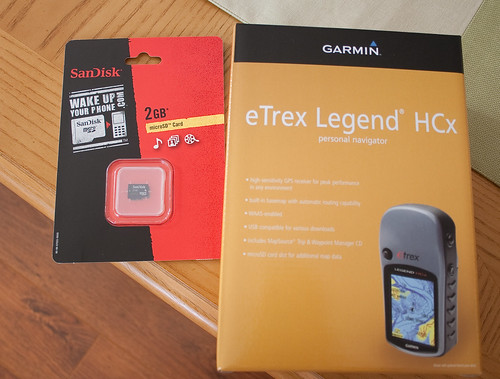 [/caption]
Recently I was listening to The Command Line Podcast and the host mentioned one way to help others is to write up a tutorial on your blog whenever you learn a new skill or task. Since the information I needed for geo-tagging my photos was fragmented, I decided to write up a tutorial following my workflow. I’ll break this up into the different phases involved.
Phase 1: Setup
First of all, if, like me, you’re using a GPS unit which is not connected to the camera, you need to sync your camera’s time with the GPS unit’s time. It’s important to be as accurate as you can be because this is how the program will automatically add the GPS data to your photo. Second, you need to set your GPS unit to record your progress. In Garmin this is called a “track”. So go into Main Menu -> Tracks. Mark it to record tracks by setting it to “on”. Go to setup and tell it to log your position every second. Then go to card setup and tell it to record to your memory card. If you don’t have a memory card, the track log will fill up very quickly. I also recommend setting the track data on the unit itself to loop over. This way if there are any problems with the unit writing data to the memory card, at least you’ll have the latest data points. You might also want to turn on WAAS for greater accuracy whenever this info is available.
Phase 2: Take Pictures
Turn on your GPS unit probably a few minutes before you begin your shoot. This allows time to get a fix in the rare instance that the unit can’t get a fix within 30 seconds to 1 minute. Put your unit in your pocket, camera bag (as long as the antenna is capable of getting a signal in the bag), or around your neck. Walk around and take photos as usual.
Phase 3: Transferring Data to your Computer
Transfer your photos to your computer, but do not load up Adobe Lightroom yet. Next transfer your GPS data to the computer. If you don’t have a memory card, load up your GPS software and transfer the tracks to your computer. Export it as a GPX file. If you do have a memory card and are using a Garmin, go into Setup ->Interface -> USB Mass Storage Device. The Garmin now appears as an external hard drive. Go to My Computer -> Drive Letter of Garmin device. Transfer the GPX files to your computer.
Phase 4: Geo-Tag The Photos
Open up Geosetter (or your program of choice). I like Geosetter because it can even tag RAW files. Navigate to the folder to which you transferred your photos. Select all the photos you wish to geo-tag. Click on Images-> Synchronize with GPS Data Files…. Then the GPS dialog will show up. Click on “…from a GPX file”. Choose the file you just transferred. (Maybe check some other options) Hit OK. This will take a few minutes if you have hundreds of photos. Once the process is complete, the GPS data will be shown as red text under the thumbnail of each photo. You can click on each photo and see on the Google map where Geosetting thinks the photo was taken. If you need to do so, fix this information. When you’re done checking (or if you trusted Geosetter from the beginning), select your photos and hit ctrl-S to save the information to the files. This might take a few minutes if you have hundreds of photos.
Phase 5: Import into Lightroom
Import into Lightroom as usual. Usually, I apply the copyright and other standard XMP data while I import. If you look on the XMP panel on the right side you can see the GPS data is now listed with your files! Congrats! It’s hard to know what specific changes you may have made in Lightroom, but when I do it, this GPS data survives the conversion to DNG. It also survives when I export to JPG for uploading to Flickr.